
A Step-by-Step Guide to Safety Valve Testing and Maintenance
Safety valves act as silent protectors in industrial workplaces, reliably keeping pressure systems steady and safe. Whether in a lively chemical plant or a far-off water treatment area, these parts guard equipment and workers from serious accidents. Skipping their care can lead to pricey delays or, even worse, risky situations. This guide lays out a clear, practical way to test and maintain safety valves, drawing on solid industry wisdom to keep your work running well. Picture a skilled worker in a noisy factory, patiently adjusting a valve to avoid a pressure jump—that’s the kind of difference we’re focusing on here.
Understanding Safety Valves and Their Role
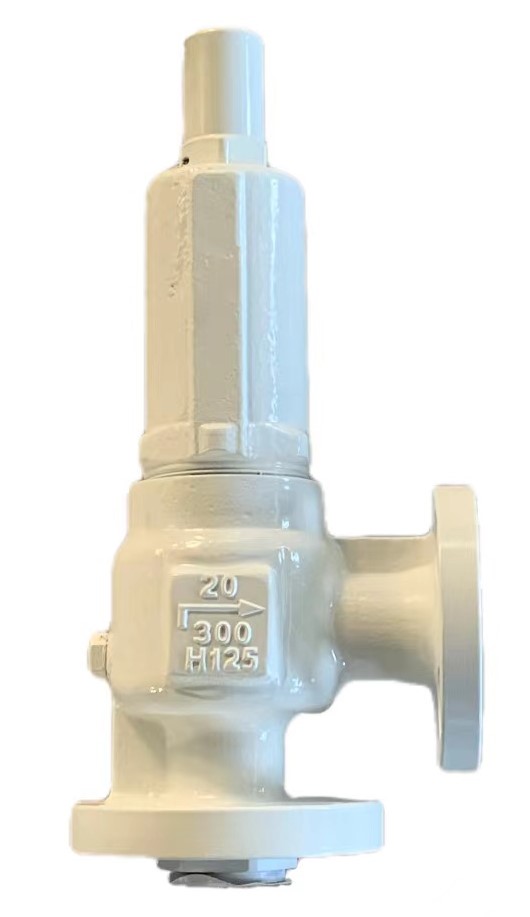
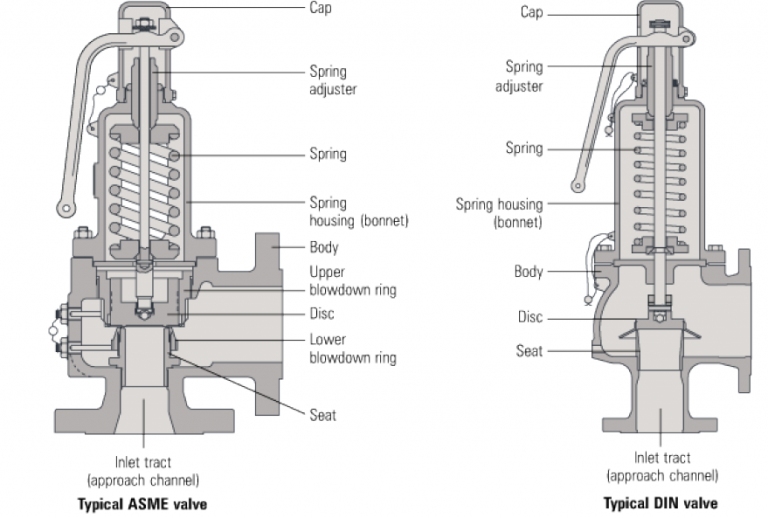
Safety valves are made to let out extra pressure from a system, stopping damage or blasts. Unlike control valves that handle flow, safety valves only start when set limits are crossed. Their trustworthiness depends on regular checks and upkeep. In areas like oil and gas or power production, one failure can stop work for days. The documents shared mention terms like “absolute pressure” and “bubble tight,” pointing to the need for precision. A well-tended valve might manage up to 150 PSI, but without steady care, even the best designs can weaken.
Step-by-Step Guide to Safety Valve Testing
Step 1: Preparation and Safety Checks
Begin by making sure the system is depressurized and cut off. Wear safety gear—gloves, goggles, and a tough helmet—since a pressured valve can be unsteady. Look over the valve’s manual for specific details, like temperature ranges from -20°F to +100°F. Gather needed tools: an accurate pressure gauge, a dependable test bench, and thorough record sheets. One time, a worker rushed past this step and faced a small leak—a hint to take it slow.
Step 2: Visual Inspection
Closely check the valve body, bonnet, and stem for rust or damage. Hunt for cracks in the seat ring or leaks near the packing box. A butterfly valve, for instance, might show wear at the pivot after heavy use. Jot down findings with pictures if possible. This step spots troubles early, saving hours of fixing later.
Step 3: Functional Testing
Hook the valve to a test bench and gently raise the pressure. Watch the set point—the pressure where the valve opens. Rules say it should lift within ±3% of the set mark. For a valve set at 100 PSI, expect it to start between 97 and 103 PSI. Write down the exact lift pressure and reseating point. If it fails, the actuator might need a simple tweak—a usual fix for pneumatic types.
Step 4: Leakage Testing
Do a bubble-tight test to judge shutoff strength. Use a test fluid, like water or air, and spot leaks with a bubble mix. Standards like ANSI B16.104 rate leakage from Class I (light) to Class VI (tightest). A valve passing Class VI allows just a few bubbles per minute, based on port size. Note any failures for repair.
Step 5: Calibration and Adjustment
If the valve doesn’t perform well, adjust the spring or actuator. For air-to-open valves, boost air pressure little by little until the right lift happens. Use a positioner for precision. A worker at a pulp mill once fixed a globe valve’s trim, restoring its accuracy after months of drift—a small shift with big results.
Step-by-Step Guide to Safety Valve Maintenance
Step 1: Disassembly and Cleaning
Turn off the system and break the valve apart. Take off the bonnet and look at inside parts—stem, seat, and disc. Clean with a solvent to remove dirt, especially in busy areas like butterfly valves. A blocked port once caused pressure buildup in a steam line—careful cleaning kept it from recurring.
Step 2: Component Replacement
Switch out worn parts, like O-rings or seals. Austenitic stainless steel pieces (e.g., 304 or 316) fight corrosion but still fade over time. Match replacements to ASTM standards for fit. Keep a list of part numbers—it makes future work easier.
Step 3: Reassembly and Lubrication
Put it back together gently, ensuring proper lineup. Spread a high-temperature lubricant on moving parts like the stem. Tighten bolts to maker’s specs—overdoing it can bend the body. A greased valve moves smoother, lessening wear.
Step 4: Final Testing
Put the valve back in and rerun the functional and leakage tests. Confirm it lifts and reseats right under working conditions. A power plant worker once skipped this step, only to find a valve stuck open during a surge—double-checking pays off.
Best Practices for Long-Term Reliability
Set Regular Intervals: Check valves yearly or follow industry rules, tweaking for rough spots like chemical plants.
Educate Personnel: Ensure workers know valve types—globe, ball, or butterfly—and their special needs.
Keep Records: Log test results and upkeep dates. A chart can help:
|
Date |
Valve Type |
Test Result |
Action Taken |
|
09/01/2025 |
Globe Valve |
Pass |
Lubricated |
|
09/15/2025 |
Butterfly Valve |
Fail |
Replaced Seal |
Track Conditions: High ambient temperatures or back pressure can speed up wear. Adjust care as needed.
Miwival: Your Trusted Safety Valve Supplier
Starting in 2015, Miwival has grown into a global leader in valve solutions, running modern facilities in China. Led by experts like Forrest Shaoke Meng, a mechanical engineer with 20 years in the field, the company mixes fresh ideas with steady reliability. Their globe control valves and desuperheaters are built for safety and efficiency, serving fields from power generation to pulp and paper. Backed by a team devoted to quality—shown by their 2022 team-building day—Miwival is ready to meet your safety valve needs with stock and know-how.
Conclusion
Caring for safety valves is more than a routine job; it’s a promise to safety and smooth operations. By using this step-by-step guide, you can stretch valve life, dodge sudden breakdowns, and safeguard your crew. The process calls for close attention—from visual checks to exact calibration—but the gain is a tough system. Let’s step forward with confidence, knowing each valve stands as a barrier against trouble.
FAQs
What is included in a step-by-step guide to safety valve testing and maintenance?
This guide covers preparation, visual inspection, functional and leakage testing, calibration, disassembly, cleaning, component replacement, reassembly, and final testing. Each step ensures the valve works within safe pressure limits and seals tight.
How often should safety valve testing and maintenance be performed?
Yearly checks are a good start, but tough conditions like high heat or corrosive settings might need quarterly reviews. Peek at your valve manual for custom schedules.
What tools are needed for safety valve testing?
You’ll need an accurate pressure gauge, a solid test bench, bubble mix, solvent for cleaning, and basic hand tools. Safety gear is a must.
How can I tell if my safety valve needs maintenance?
Look for signs like leaks, slow moves, or rust. A failed bubble-tight test or shift from the set pressure point means it’s time for a closer look.


 consult
 WHATSAPP
 leave message
 top
top