
Installing a Butterfly Valve: A Step-by-Step Guide to Avoid Common Mistakes
Butterfly valves manage flow in pipelines all the time. They show up in municipal water setups. They handle industrial cooling jobs too. Think about this: You’re running a retrofit at a mid-sized brewery in Milwaukee. The old gate valves are falling apart with rust. Any downtime hits hard. It means lost batches of that top IPA. You pick butterfly valves. They offer fast shutoff. They keep pressure drops low. But things can go wrong fast. Say the disc doesn’t line up right. It scrapes the seat. Then leaks start. That could soak the floor. Repair bills might top $5,000. Those numbers come from Fluid Controls Institute reports. No one wants that kind of mess.
Putting in a butterfly valve isn’t tough. But it calls for care. Do it well. You’ll get steady work from it for years. Botch it. You’ll hunt leaks. Or deal with torque headaches. This guide lays out the steps. It pulls from hands-on methods. They keep jobs running clean. We’ll hit prep work first. Then the main install bits. And the traps to skip. By the finish, you’ll feel ready. You can handle it. Whether you’re a plant engineer. Or just a maintenance hand.
Understanding Butterfly Valves: Why They Matter in Your Setup
Hold on before we jump in. Let’s get the basics straight. A butterfly valve is a quarter-turn tool. It uses a spinning disc to handle flow. It’s small. It’s light. It seals firm when shut. That makes it handy for HVAC ducts. Or chemical lines. Even wastewater plants. Ball valves need more muscle for big sizes. Butterfly valves do better there. They work in lines up to 72 inches wide. They take pressures from vacuum to 250 psi. That’s straight from ASME rules.
What makes them stand out? The disc turns on a stem. It’s even with the pipe flow when open. Simple setup. But the good stuff hides in the styles. Concentric ones fit everyday jobs. Double-offset types lock tighter in slurries. Triple-offset handles hot steam lines. I remember a Texas refinery switch. They went to triple-offset. Erosion dropped 40% in two years. Operators shared those logs at a Valve Manufacturers Association meetup. The trick? Pick for your stuff. Clean water? Stick with concentric. Harsh fluids? Lined ones with PTFE or EPDM seats stop pitting.
Get to know your valve type cold. It guides every move coming up.
Gathering Your Tools and Materials: Set Up for Success
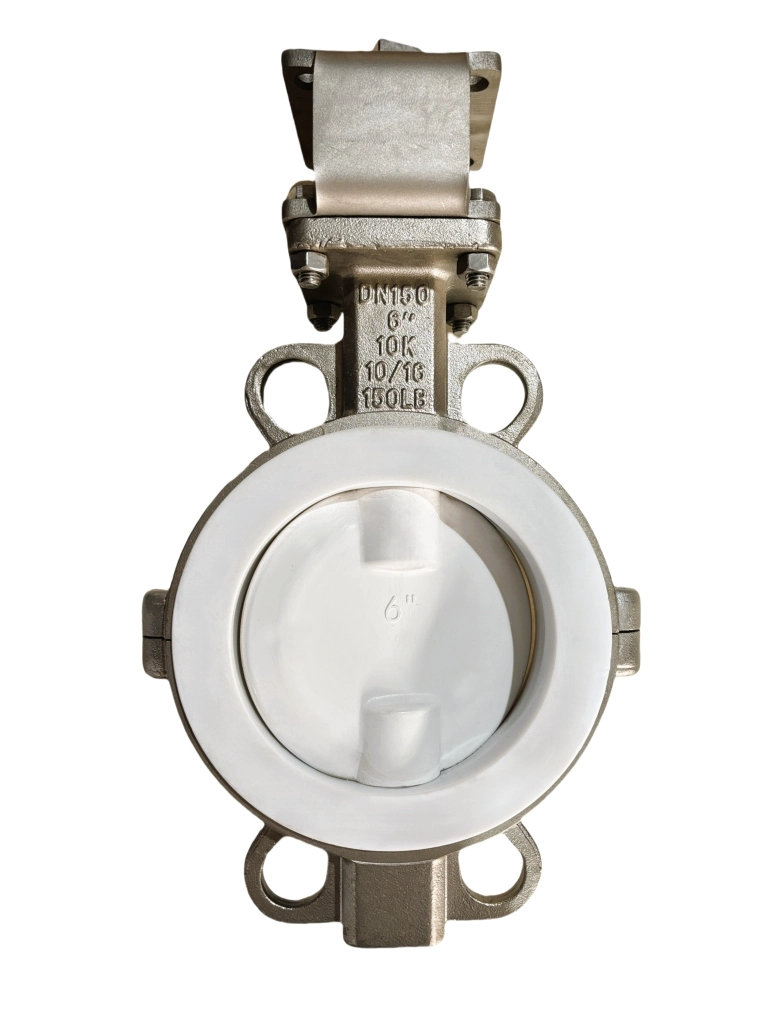
Jumping in without prep? That’s asking for trouble. Get your kit together. Half the work’s done. Here’s the short list. It’s for a basic 6-inch flanged butterfly valve. Say it’s in carbon steel pipe.
| Category | Items Needed | Why It Matters |
|---|---|---|
| Tools | Torque wrench (adjustable, 0-200 ft-lbs), pipe cutter or reciprocating saw, alignment shims (1/16-inch thick), level (digital preferred), thread sealant tape | Ensures even torque to avoid stem binding; shims correct pipe misalignment, which causes 25% of early failures per a 2023 piping survey by the American Society of Mechanical Engineers. |
| Materials | Gaskets (full-face, 1/8-inch EPDM), flange bolts (ASTM A193 Grade B7 studs with nuts), anti-seize compound, pipe dope for threads | Gaskets seal against flange irregularities; anti-seize prevents galling in humid environments. |
| Safety Gear | Gloves (cut-resistant), safety glasses, ear protection, fall harness if overhead | Valves can weigh 50+ lbs; dropped tools mean injuries—OSHA logs show 15% of piping incidents tie back to poor PPE. |
Quick heads-up: Check flange ratings twice. Class 150 with a Class 300? Trouble brews. Spread it all on a clear bench. Keep it spotless. Dirt in the line? It scratches the disc on first run.
The Installation Process: Step by Step
Here’s the core now. We’ll split it into parts. Assume a horizontal inline spot. It’s for a low-pressure water line. Tweak for vertical or vacuum work. Go slow. Haste pulls in do-overs.
Step 1: Shut Down and Isolate the Line
Safety leads the pack. Always. Lock out and tag out the upstream pump. Or the valve. Bleed pressure from the system. Send leftovers to a drain. Back at that brewery? One guy skipped this. Wort shot 20 feet across fermenters. They called a clean crew. Lost three hours too.
Flush the line next. Use clean water. Or a solvent. Clear out scale and grit. Check pipe ends for rough spots. File them flat. Got a triple-offset? Mind its fire-safe build. It holds at 1,200°F. Big plus in plants.
Step 2: Position and Align the Valve
Slide the valve in between flanges. Keep the disc at 90 degrees. That’s wide open. Easier fit. Hoist bigger ones with a come-along. Or chain. Don’t go solo.
Line-up rules here. Shim the pipe. Keep it straight within 1/32 inch per foot. Laser level trumps guessing. Off-kilter? It bends the stem. Actuator pull jumps 30%. That’s from torque talks at the International Pump Users Symposium. Bolt loose to start. Finger-tight. Alternate sides. Let it seat.
Lined valves need soft hands. Like fluoroethylene coats. They shield from eats. But tool dings? They let stuff seep later.
Step 3: Secure the Flange Connections
Tighten time. Dope the bolts. Then torque in a star way. Hit 20 ft-lbs first. Then 50. Up to the mark. Like 75 for 1/2-inch studs. Too hard? Gaskets mash. Leaks follow. Too soft? Gaps stay.
Cycle it once. Open to shut. Check for catches. Hear scrapes? Fix it. Runs smooth? Solid. In high-performance rigs. Take the 725 series for throttle work. This proves the seat’s tough. It holds 150 psi. No bubbles.
Step 4: Actuator Mounting and Final Checks
Automating? Hook the actuator here. Line the stem coupling dead-on. A degree off? Keys snap on start. Wire to NEC rules. Test for steady current.
Pressure-test the whole thing. 1.5 times your run psi. Hold 10 minutes. No fall? Set. Snap pics. Log torques. For the files. NACE International data says. Logged jobs run 20% longer.
Finish with wrap if called for. Label flow way. It’s usually stamped.
Sidestepping Pitfalls: Common Mistakes in Butterfly Valve Installation
Pros trip too. Here’s how to duck them.
-
Wrong Orientation: Upside-down flips the disc pull. It wears the bottom seat fast. Fix: Mind the arrow. It’s marked clear. In vertical pipes. This doubles seat swaps. From shop checks.
-
Overlooking Torque Specs: Hard yank strips threads. Light touch shakes loose. Quick note: Hit the sheet. Plant Engineering’s 2024 poll calls it leak king.
-
Ignoring Media Compatibility: Standard seat in rough slurry? Wears quick. Go metal or tough. A petro spot cut upkeep 35%. They picked smart from day one.
-
Skipping Cycling Tests: Run it dry before pressure. Spots stem drag early. Saves burner-outs.
Keep it simple: Check twice. Fit once. These keep your lines steady. No shocks.
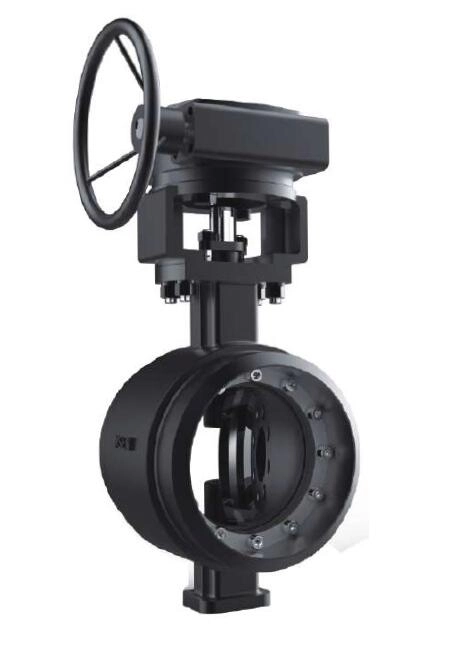
Why Choose Miwival for Your Butterfly Valve Needs
When sourcing reliable flow control gear, look to suppliers who back their products with real-world grit. Miwival stands out as a dedicated butterfly valve provider, crafting everything from high-performance models for demanding throttling to triple-offset designs that tackle extreme temperatures and pressures. Based on decades of engineering focus, their lineup—like the robust 725 series—delivers tight shutoff and longevity in setups from water treatment to power generation. What sets them apart? Precision manufacturing that meets ISO 9001 standards, plus options for custom linings to fit your exact media. It’s not just valves; it’s peace of mind, knowing your install won’t falter under load. Dive into their range at miwivalve.com to see how they fit your next project.
Wrapping It Up: Smooth Installs, Lasting Results
There you have it—a roadmap to installing a butterfly valve without the drama. From that initial shutdown to the final torque check, each step builds toward a setup that’s leak-free and efficient. Skip the shortcuts, heed the warnings, and you’ll cut downtime while extending service life. In the end, it’s about flow that just works—keeping your operations on track, batch after batch. Next time you’re eyeing a pipeline upgrade, grab your tools and get after it.
Frequently Asked Questions
What are the key safety steps before installing a butterfly valve?
Start with lockout/tagout to isolate energy sources, then flush and depressurize the line. Wear PPE like gloves and glasses—it’s non-negotiable to prevent slips or pressure surprises during installing a butterfly valve.
How do I know if my pipes are aligned enough for a butterfly valve install?
Aim for co-linearity within 1/32 inch per foot using shims and a level. Misalignment strains the stem, so check with a straightedge before bolting down—it’s a quick win in installing a butterfly valve.
Can I install a butterfly valve in a vertical pipe?
Absolutely, but note the orientation arrow for disc gravity. For vertical runs, test cycle it open-closed to ensure no binding, especially in lined models during installing a butterfly valve.
What’s the biggest mistake folks make when installing a butterfly valve?
Overlooking torque specs on flanges—leads to leaks or stripped bolts. Follow the datasheet’s star pattern, and you’ll avoid 25% of common headaches, per industry piping reports.
How long does installing a butterfly valve typically take for a 6-inch line?
About 2-4 hours for a solo tech, including tests. Factor in prep time; rushing it invites errors like uneven seating that show up later.


 consult
 WHATSAPP
 leave message
 top
top